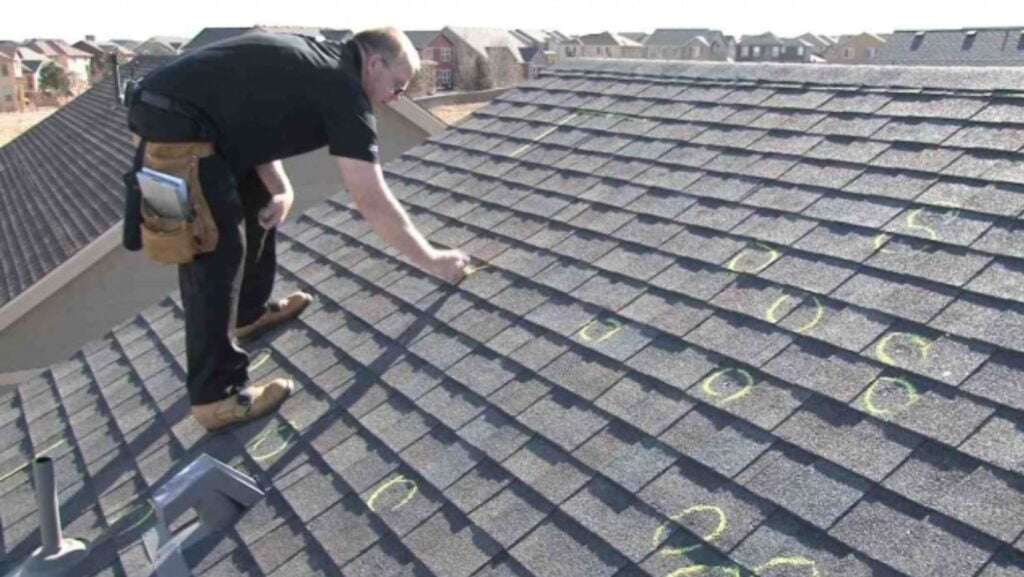

A major storm rolls through, and the next morning you spot missing shingles, dents, or a leak you have never seen before. Your homeowner’s insurance should cover storm damage — but the claims process can be confusing, slow, and frustrating if you do not know the steps. This guide walks you through how to file a roof insurance claim the right way so you get the coverage you are entitled to.
What Does Homeowner’s Insurance Cover on a Roof?
Most standard homeowner’s policies cover roof damage caused by sudden, accidental events — often called “perils.” Common covered causes include:
- Wind and hail damage
- Falling trees or debris
- Fire and lightning strikes
- Weight of ice and snow (in applicable climates)
What is typically not covered:
- Normal wear and tear or aging
- Neglected maintenance (moss buildup, clogged gutters leading to rot)
- Flood damage (requires separate flood insurance)
- Cosmetic-only damage in some policies (dents that do not affect function)
Review your policy’s declarations page before filing. Pay special attention to your deductible — in hurricane-prone states like Florida and Texas, wind/hail deductibles are often a percentage of your home’s insured value (typically 1–5%) rather than a flat dollar amount.
Step 1: Document the Damage Immediately
As soon as it is safe, begin documenting the damage. Thorough documentation is the single most important factor in getting your claim approved.
- Photograph everything: Take wide-angle shots showing the full roof plus close-ups of specific damage. Include interior damage like water stains, wet insulation, and ceiling drips.
- Video walkthrough: A short video showing the damage in context strengthens your file.
- Save damaged materials: If shingles or flashing blew off, collect and keep them.
- Note the date and time: Record when the storm occurred and when you discovered the damage. Insurance policies have deadlines for reporting, often 30–60 days.
Step 2: Prevent Further Damage
Your policy requires you to take reasonable steps to prevent additional damage. This is called your “duty to mitigate.” Temporary measures include:
- Covering holes or missing shingles with a tarp
- Placing buckets under active leaks
- Moving furniture away from water intrusion
Keep receipts for any emergency materials you purchase — tarps, plywood, roofing cement. These costs are typically reimbursable under your claim. For guidance on emergency fixes, see our article on how to repair a roof leak.
Step 3: Contact Your Insurance Company
Call your insurance company’s claims line as soon as possible. When you call:
- Have your policy number ready
- Describe the damage and the event that caused it
- Ask about your deductible and any filing deadlines
- Request a claim number and the name of your assigned adjuster
Most insurers allow you to file online or through a mobile app as well. However, a phone call ensures you get immediate confirmation and can ask questions.
Step 4: Get a Professional Roof Inspection
Before the insurance adjuster visits, hire an independent roofing contractor to perform their own roof inspection. A qualified roofer can identify damage that an untrained eye would miss, such as:
- Bruised shingles (hail impacts that weaken the mat without breaking the surface)
- Compromised flashing around vents, chimneys, and skylights
- Cracked or shifted ridge caps
- Damaged underlayment visible only after shingle removal
The contractor’s report and estimate serve as valuable documentation if your insurance company’s adjuster undervalues the damage.
Step 5: Meet With the Insurance Adjuster
Your insurance company will send an adjuster to inspect the roof. To make this meeting productive:
- Be present during the inspection so you can point out all areas of concern
- Share your contractor’s report and photos
- Walk the property together — show interior damage too, not just the roof
- Ask questions about anything the adjuster notes or excludes
The adjuster will prepare a scope of loss and damage estimate. You are entitled to a copy of this document.
Step 6: Review the Settlement Offer
After the adjuster’s visit, your insurance company will send a settlement offer. Review it carefully against your contractor’s estimate. Common issues to watch for:
- Depreciation deductions: If your policy pays Actual Cash Value (ACV) rather than Replacement Cost Value (RCV), the payout will be reduced based on your roof’s age.
- Missed damage: Adjusters sometimes overlook damage on less visible roof planes or underestimate the scope of work.
- Code upgrade exclusions: If your local building code requires upgrades (like new underlayment or enhanced fastening), these costs should be covered under “ordinance or law” coverage if your policy includes it.
What If Your Claim Is Denied or Underpaid?
You have the right to dispute the outcome. Options include:
- Request a re-inspection: Ask your insurer to send a different adjuster.
- File a supplement: Your contractor can submit additional documentation showing missed damage.
- Hire a public adjuster: An independent adjuster who works for you, not the insurance company. They typically charge 10–15% of the payout.
- Contact your state insurance commissioner: If you believe the denial is unfair, your state’s Department of Insurance can investigate.
Get Help With Your Roof Damage Claim
Navigating a roof insurance claim is stressful, but you do not have to do it alone. Roofing Quote Today connects you with experienced roofing contractors who work with insurance companies daily. They can inspect your roof, document the damage, provide a detailed estimate, and even meet with the adjuster on your behalf.
Call 844-677-2023 today for a free storm damage inspection, or visit our contact page to get started.